Create Floor Plan and Report
Create DXF Floor Plan from 2D view
A floor plan created from the 2D view represents a “compressed” view of the building story. All objects such as rooms, walls, windows and doors which are contained in the story will be visible in the floor plan. This differs from creating a floor plan from the 3D View.
- In the 2D view, click Create Floor Plan
 .
. -
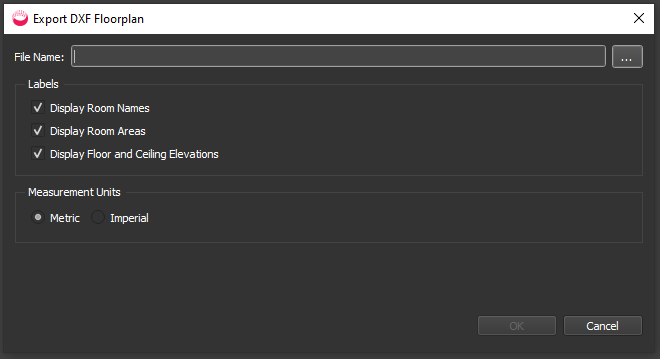
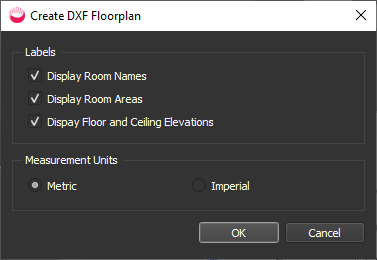
In the popup dialog, choose whether to display Room Names, Room Areas, Floor and Ceiling Elevations, and choose the Measurement Units.
- Choose a file location and name and click OK.
- Open the floor plan in a DXF viewer. For example:
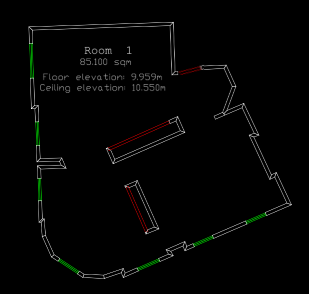
Walls are exported without color, so if viewing with a white background, you will need to change the setting in the viewer to a dark color, so you can see them.
Create DXF Floor Plan from 3D view
A floor plan created from 3D view represents a planar slice of the 3D model. Objects such as rooms, walls, windows and doors which are not intersected by the plane will not be visible in the floor plan. This differs from creating a floor plan from a 2D View.
- In the 3D view, click Create Floor Plan .
- A dialog is displayed. Select a story and click OK.

- You see a selection plane:
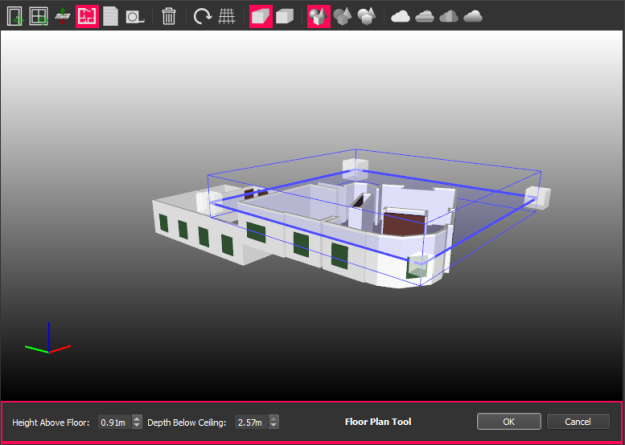
- Adjust the height of the plane by dragging the plane or a corner node and click OK.
- In the popup dialog, choose whether to display Room Names, Room Areas, Floor and Ceiling Elevations, and choose the Measurement Units. Then click OK.
- Choose a file location and name and click Save.
- Open the floor plan in a DXF viewer. For example:
Walls are exported without color, so if viewing with a white background, you will need to change the setting in the viewer to a dark color, so you can see them.
Create Report of BIM Model
To create a report of a classified mesh models, see Create CSV Report of Classified Mesh Model.
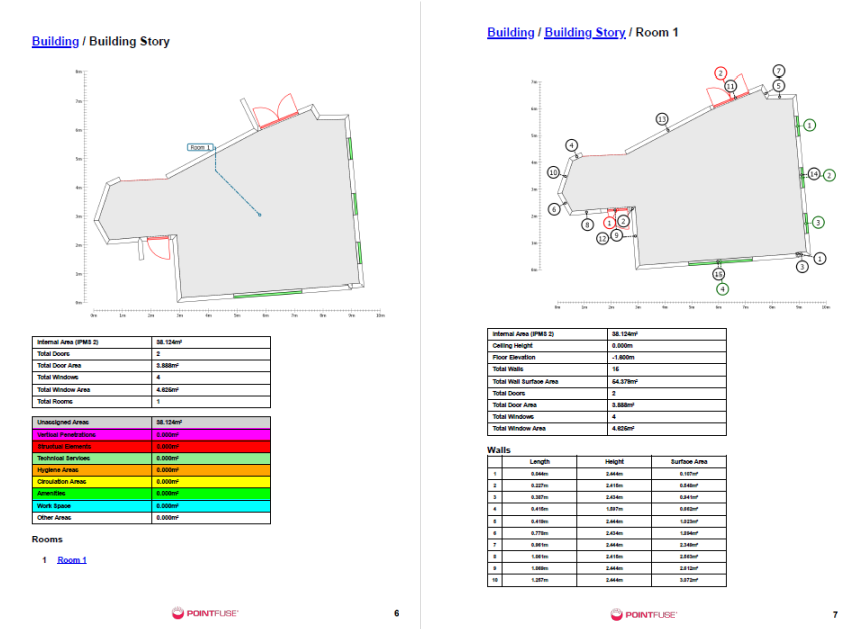
You can create a report that summarizes the number of stories, rooms, doors, and windows, as well as the total room area for the site.
It includes a floor plan for each story, similar to the one in PointFuse. It also states the number of rooms, doors, and windows, plus and room area for each story.
For each room, there is a floor plan with detailed statistics, including the Length, Height, and Surface Area of each wall, door and window.
- In the 3D view, click Create Report
 .
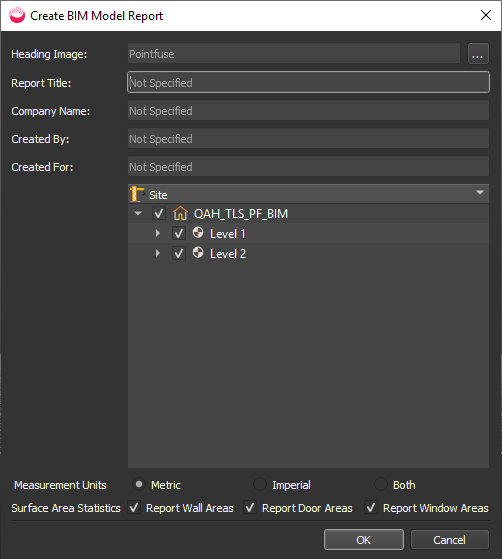
. - In the Create BIM Report dialog, add metadata such as Heading Image, Report Title, choose which building storys to include, the Measurement Units, and which Surface Area Statistics to include, then click OK.
- In the File Save dialog, navigate to a location, specify a File Name and File Type (PDF, HTML, or CSV), and click Save.
- Open the report.
If you chose CSV, you will have one folder containing CSV files for different components (buildings, doors, rooms, stories, walls, windows).
A PDF will be a single document with pages like these: